

Developing with VSCode + Podman on the Steam Deck
The Steam Deck is Valve’s first handheld console, running the Arch Linux based SteamOS 3. It features several changes like a read-only filesystem, A/B partitions, and image based updates. This means that while it is possible to write these partitions by using developer mode and remounting as read-write, any update will wipe all changes. Flatpak is provided as the recommended way for installing applications, however this isn’t really friendly to development-like workloads where you need a variety of build tools, preferably containerized.
This guide shows a setup for developing in containers using VSCode on the Deck, without developer mode or modifying the read-only partitions.
I picked writing documents using LaTeX as the workload demonstrated here, however anything else you can develop in a container can work.
# Why?
Mainly to show that it is a viable development device. While the screen size might make it inconvenient, I can imagine it being used with a stand and a keyboard. I personally just used a ThinkPad dock and a full-size keyboard for experimenting, but there are much more portable alternatives.
# How?
We are going to run a user-install podman in rootless mode as a daemon on the host, having it listen on a socket. Then we pass through this unix socket to the Flatpak version of VSCode. This way we can use the Remote - Containers addon for developing in the container.
# Steps
-
Make sure you have a password set for the deck user. If there isn’t, be sure to set one with
passwd. As this is stored on/etc, it isn’t erased across updates. -
Install static podman from Distrobox
-
Create a user service for podman. Add these two files:
 $ cat ~/.config/systemd/user/podman.service
 [Unit]
 Description=Podman API Service
 Requires=podman.socket
 After=podman.socket
 Documentation=man:podman-system-service(1)
 StartLimitIntervalSec=0

 [Service]
 Delegate=true
 Type=exec
 KillMode=process
 Environment=LOGGING="--log-level=info"
 ExecStart=/home/deck/.local/podman/bin/podman $LOGGING system service

 [Install]
 WantedBy=default.target
$ cat ~/.config/systemd/user/podman.socket [Unit] Description=Podman API Socket Documentation=man:podman-system-service(1) [Socket] ListenStream=%t/podman/podman.sock SocketMode=0660 [Install] WantedBy=sockets.target -
Make the socket user service automatically start on login:
systemctl --user enable podman.socket -
Allow the podman socket to be passed through to Flatpaks:
flatpak override --user --filesystem=/run/user/1000/podman/podman.sock -
Install VSCode from Flathub
-
Install the podman-remote extension for the VSCode flatpak:
flatpak install flathub com.visualstudio.code.tool.podman -
At this point we should be done with all the setup needed on the uncontainerized host. Reboot the system, then open a terminal and test if we can reach podman:
 $ curl -X GET --unix-socket /run/user/1000/podman/podman.sock http://d/v3.4.7/libpod/_ping
 OK
Then do the same test inside VSCode’s terminal. If everything went well, this should also work.
-
Let’s test podman-remote inside VSCode’s flatpak. Since this does not have slirp4ns, we have to use
--net=host:$ podman-remote start -it --rm --net=host fedora:36 [root@steamdeck /]#Great, so everything works. On to setting up VSCode.
-
Install the Remote - Containers extension from Microsoft. It requires Docker (which we will substitute with
podman-remote) and docker-compose, which we can install viapip, issued in the VSCode terminal:python -m pip install docker-compose -
In Settings for the extension, set docker command to
podman-remoteand docker-compose command to/var/data/python/bin/docker-compose -
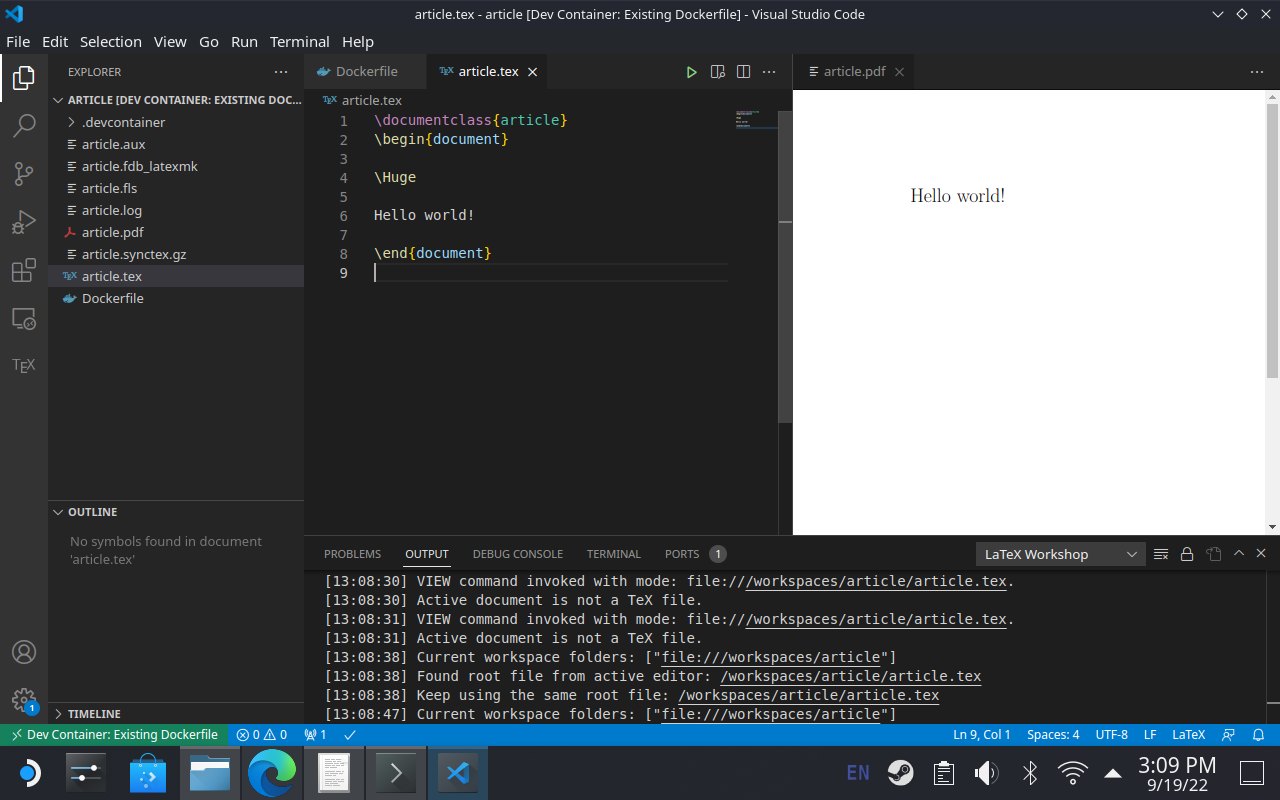
At this point we should be done with all setup that’s needed, and can start developing. As the first environment I chose LaTeX, as I wanted to edit some documents. I created a new folder for the project, and added a Dockerfile for the needed environment:
FROM fedora:36

RUN dnf install -yq texlive-scheme-basic texlive-chktex latexmk
And let the Remote Containers extension generate a
devcontainer.jsonfor me. That needed an addition, to avoid the previously mentioned problem with slirp4ns:"runArgs": [ "--net=host" ]If you accidentally launched before adding this option, you might have a container that cannot be started anymore. In this case delete it by the id displayed in terminal and let it get regenerated.
-
After this, you should be able to simply click the icon in the lower left corner, and select Relaunch in container. The container should get built, and you can start developing! (or in my case, writing documents)